How to Import iTunes Videos into iMovie or Final Cut Pro?
If you often watch iTunes movies or TV shows, you must have marveled at some chapters with shocking images and special shot ways. Have your ever thought to add those fantastic chapters to your own videos? If you are a Mac user, you may probably edit iTunes videos in iMovie or Final Cut Pro. But you'll find it hard to import iTunes videos into iMovie or Final Cut Pro due to DRM protection. So you have to remove DRM and convert iTunes videos to iMovie or Final Cut Pro supported format before importing iTunes videos into iMovie or Final Cut Pro. To make it possible, you'll need AVS4Mac iTunes to iMovie/Final Cut Pro Converter.

AVS4Mac iTunes to iMovie/Final Cut Pro Converter is a professional DRM remover which provides prodefined iMovie and Final Cut Pro ProRes Profile. It supports professional encoders like Apple Intermediate Codec, ProRes to ensure maximum editing quality and efficiency when working with Apple software. What's more, AVS4Mac iTunes to iMovie/Final Cut Pro Converter can extract audio from iTunes videos, so you can add the audio background to your own videos.
In addition, after removing DRM, you can also share the videos with your family or friends and enjoy the unprotected videos on any device such as Samsung Galaxy Series, Amazon Kindle Fire, Nexus, Nook, HTC, etc. Now, follow the step-by-step tutorial about how to import iTunes videos into iMovie or Final Cut Pro.
![]()
![]()
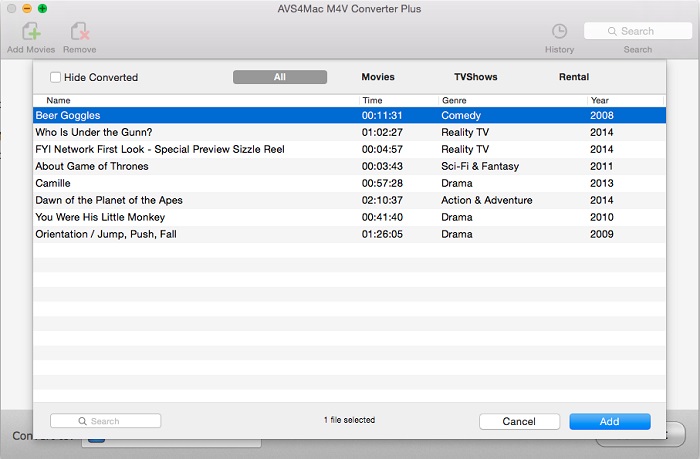
Step 1--Add M4V Videos
Click the "Add Movies" button in the top-left, then software will open the iTunes movies library by default and all available videos will be listed. You can choose different categories such as Movies, TV Shows, Rental, etc. Select the needed files and then click "Add".
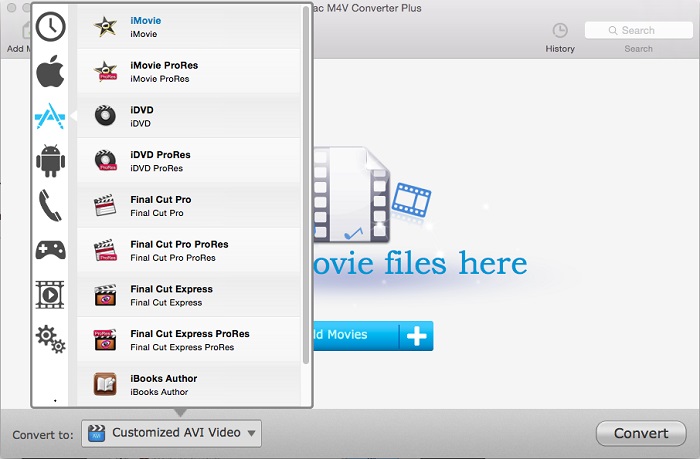
Step 2--Adjust Profile Setting
Go to the list next to "Convert to" and choose "Apple Software" icon. You can choose the prodefined output format "iMovie ProRes" or "Final Cut Pro ProRes" in "Profile" drop down list.
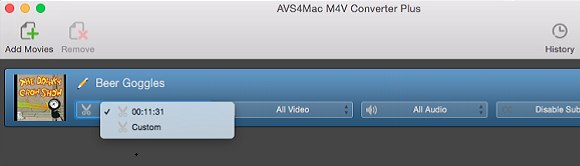
Step 3--Choose A Chapter
AVS4Mac iTunes to iMovie/Final Cut Pro Converter enables you to keep the chapters of the original video with setting Begin and End time for each video to get the specific section. Click the time setting box then choose "Custom" option, input the Begin and End time to choose a chapter you want.
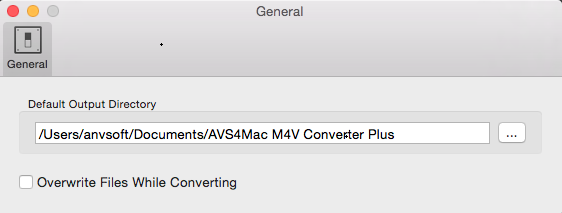
Step 4--Custom Output Path
Click menu bar "AVS4Mac M4V Convert Plus>Preferences", in the popup box, you can click "..." button to change the output path and "Open" button to open the output folder. If you don't custom output path, the output files will be saved in the default folder.
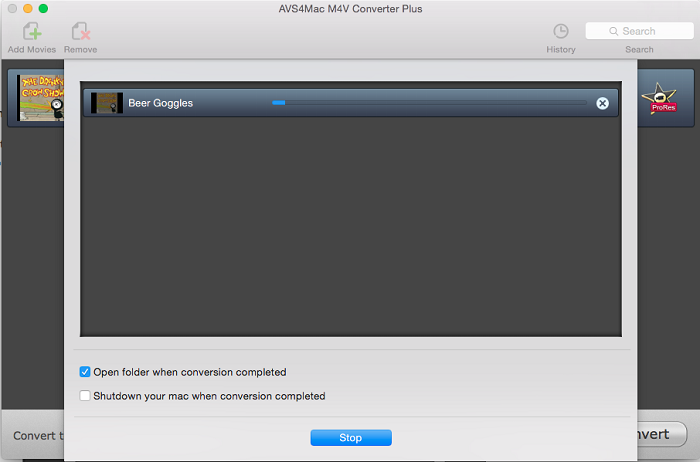
Step 5--Start Conversion
Click "Convert" button to remove the DRM protection and convert iTunes videos to iMovie or Final Cut Pro supported format. AVS4Mac iTunes to iMovie/Final Cut Pro Converter supports batch M4V Conversion to save your time by creating a batch list of M4V videos.
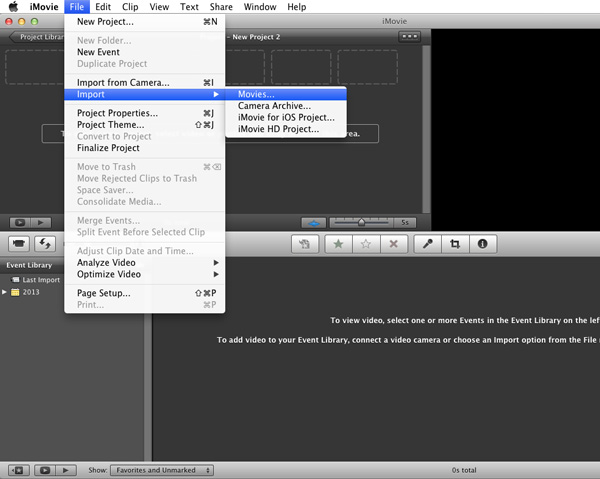
Step 6--Import iTunes Videos Into iMovie or Final Cut Pro
After the conversion, you can easily import iTunes videos into iMovie or Fianl Cut Pro. Please launch your iMovie or Final Cut Pro, go to the menu bar, click "File > Import > Movies".
Note: The trial version of AVS4Mac iTunes to iMovie/Final Cut Pro Converter only allows one minute conversion. You can purchase the full version with only $44.95 while the original price is $49.95.
![]()
![]()
Extra Recommendation:
TuneCable Spotify Converter is a well-designed Spotify music downloader which is able to convert Spotify songs, albums and playlists to MP3, AAC, WAV or FLAC format at 10X faster speed with lossless output audio quality.
![]()
![]()